

 — Recommendations are independently chosen by Reviewed’s editors. Purchases you make through our links may earn us a commission.
I love to DIY. My many hobbies include crocheting, embroidering, knitting, pour painting, and more recently, making resin jewelry! A friend showed me how to use resin and my life has not been the same: I’m obsessed. It’s a wonderful creative outlet that produces beautiful, wearable art in the forms of earrings, necklaces, rings, and more—and that can also make you a few bucks if you decide to sell them, or at least give them as gifts to friends and family. Here’s what I recommend if you want to get into this hobby, too.
Start with an all-in-one kit
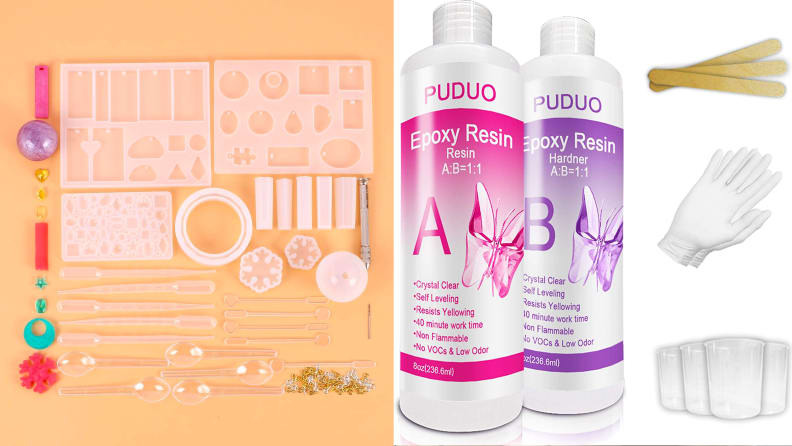
You can't do anything without your epoxy resin, hardener, and molds.
For beginners, I highly recommend buying a resin jewelry making kit, which will have a majority of the things you need. I have this great kit from Shein that comes with various resin molds, spoons, pipettes, stirrers, screw eye hooks, and even a hand drill. Then all you need to buy is the resin, hardener, and a more general jewelry making kit which has the pliers, tweezers, open circles, necklace chains, earring hooks, and other hardware for converting your resin pieces to items you can wear. Once you’ve practiced, you’ll get an idea of what pieces you most enjoy making and you can get more specialized.
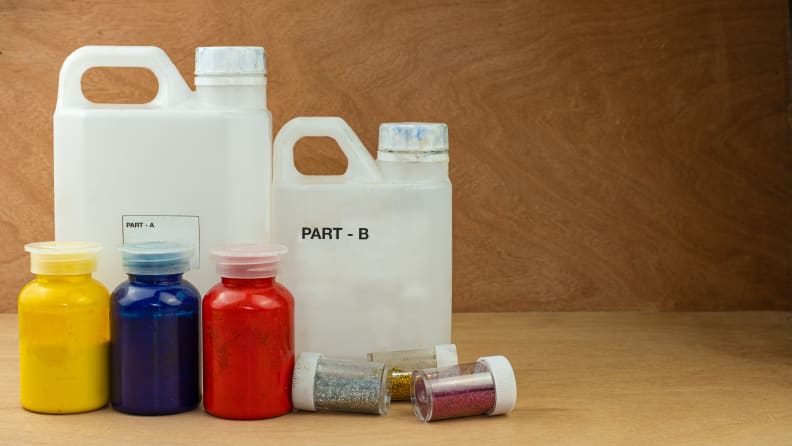
Assemble additional jewelry-making supplies
Before you start, you’ll need some other items that the kits listed above don’t come with. These items include:
- Epoxy Resin and Hardener (you can’t do anything without these two!)
- Color pigments to tint the resin
- Wooden stir sticks
- Plastic cups
- A food storage container or bowl large enough to cover your molds
- Baby oil or vitamin E oil
- Nitrile gloves
- Respirator mask
- A hair dryer or a heat gun
Step 1: Set up your workspace and supplies
Make sure you grab all your supplies before you get started.
First things first, you need to make sure you’re all set up and ready for things to get sticky. Lay out some newspaper, a table cloth, or a drop cloth over a surface you’re okay with getting sticky, put on some gloves and a mask, and grab all your materials. Get comfy, keep some paper towels (damp and dry) nearby in case of a mess, and double-check that you have everything you need within reach.
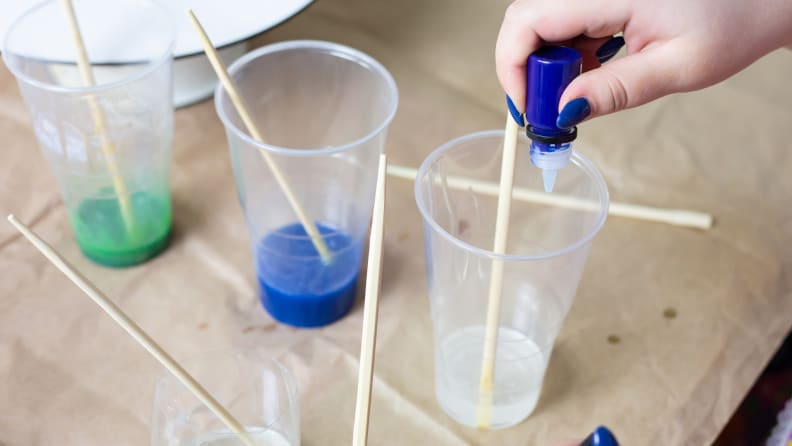
Step 2: Pour your resin and hardener
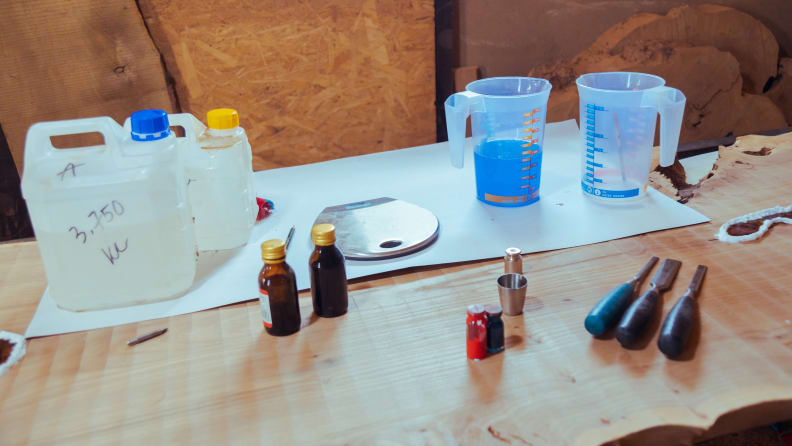
Check the bottle to see the ratio of resin-t0-hardener you should use.
Grab your plastic cups, one for each color of resin you plan to use. Most resin and hardener combos have you mixing equal parts of each—I usually use 4-ounce cups and pour about a half-inch of each in, to fill the cup halfway. Make sure to read the instructions on the resin and hardener just to make sure different amounts aren't required, like 2-to-1 or something strange.
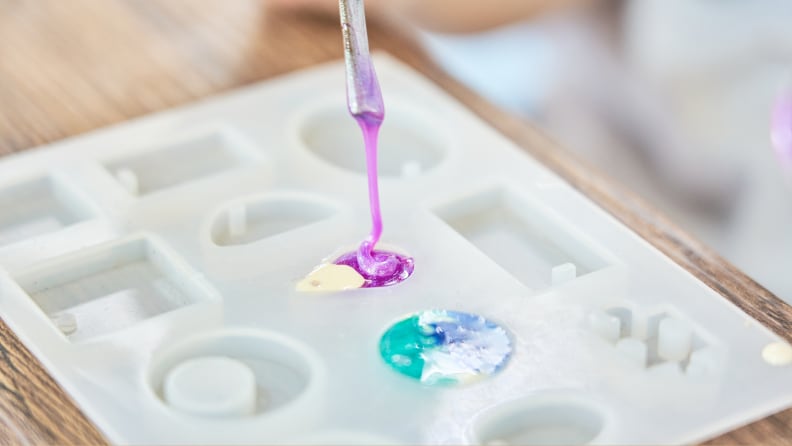
Step 3: Add your color pigments and mix
Because resin starts out cloudy translucent, the more color pigment you add, the more brilliant the hue of your jewelry.
On its own, resin is colorless and translucent. If you want your jewelry to be colorful, you'll need to add some color pigment into the mixture. For a lighter hue, add only one or two drops; for more deep shades, add more. If you want to get really creative, you can mix colors, like you would paints. Using a wooden stick, stir the mixture together until the color is fully combined, about 3 minutes. Pro tip: Use a different wooden stick for each, so you don’t get the colors all mixed up. Once you have your colors ready, you have about 20 to 40 minutes or so to work with the resin before it starts to harden. You don’t have to rush, but don’t walk away and make a sandwich.
Step 4: Grab your silicone resin molds
This mold looks like an ice cube tray made of flexible silicone.
When you have all the resin mixtures and colors you want, now grab your silicone molds. Many of these resemble ice-cube trays, but the shapes can vary from long, cylindrical cones or boxes to simple shapes like hearts, snowflakes, or letters. I like to keep the molds on a steady surface because it’s essential that they don’t tip over during the process. Now it’s time to have some fun!
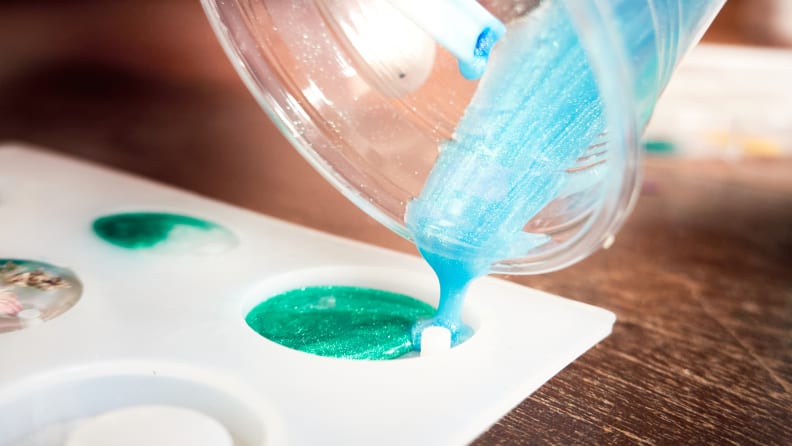
Step 5: Make your resin pieces
Using a pipette to pour the resin in the mold is a great technique to get it to look how you'd like it to.
Depending on your mold and the kind of jewelry you plan to create, you’ll have to approach the process differently. If you’re using a mold that’s a flat sheet for earrings or rings, you can use a little spoon to scoop the resin into the mold. If you’re trying to fill a skinny, cylindrical mold for, say, a necklace pendant or earrings, you may need a pipette to help transfer the resin into the mold.
With your tool of choice, transfer the resin from the plastic cups into the molds in whatever pattern or design you prefer. Some techniques you might try are layering one color on top of the other, streaking color in stripes, or pouring one color from each side of the mold and letting them meet in the middle. Your designs can be as simple or as intricate as you’d like, but make sure you fill the molds all the way to the top.
Step 6: Get bubbles out of the resin
Pop any bubbles that might have come up during mixing with a heat gun or hair dryer.
Without a little help, your resin may have air bubbles that will affect the look of your final product. Grab a blow dryer or heat gun and wave it back and forth across, about an inch above the molds. The goal is to heat the molds so that any air bubbles that may have been in the resin mixture from you stirring it or transferring it will rise to the surface and pop. Do this for a few minutes until you don’t see any more air bubbles cresting and the top of the resin looks smooth.
Step 7: Store the molds carefully while they set
If you can’t just leave your molds where they are, pick them up carefully so as not to spill or warp them, and place them on a level surface where they won’t get knocked into or disturbed for at least two days while the resin fully cures.
While they’re in their new home, cover the molds with an overturned food storage container or bowl to prevent dust from landing on top as they set.
Step 8: Slip your resin jewelry out of their silicone molds
For perfect-looking jewelry, your timing is key here. You don’t want to remove your resin creations too early or they’ll become warped. Don’t touch the molds for at least 24 hours after making them. Some resin may be set by then, but typically the longer you leave it, the harder it will get. If you leave them for too long, say a week or so, it may be hard to do the next step, which turns these little pieces into wearable jewelry.
Test one piece to see if it’s hard enough, and if it feels firm and not flexible, it’s time to take them out of the molds. For flat molds, it should be simple enough to pop the resin out. But for the long, skinny molds, sometimes it can be hard to extract the resin. The trick I use is to squirt some baby oil or vitamin E oil into the sides of the mold, wiggling it down into the mold as I do it to loosen the resin. It takes some patience, but you don’t want to risk ripping the mold or breaking your jewelry. Once it’s well lubricated, it’ll slide out easily.
Step 9: Drill pilot holes for the jewelry hardware
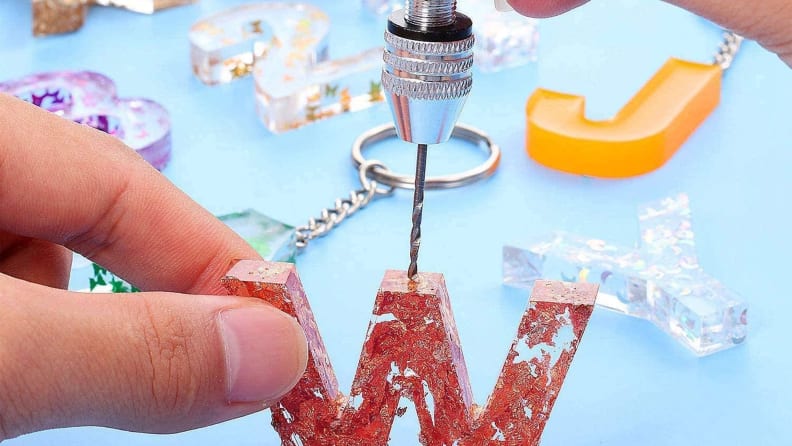
Hand drills are a great tool for drilling into small pieces of jewelry.
To make your resin creations into wearable art, you will need to add metal hardware to it. For earrings, this means screw-eye hooks and earring hooks. For necklaces, this means screw-eye hooks and a necklace chain. Therefore, in most cases, you’ll need to drill pilot holes for those screw-eye hooks. Some molds will come with holes already pre-made, so your jewelry piece will have a hole already. But I like to drill my own so I have control over what will be the front of the jewelry. Figure out ahead of time which drill bit for your hand drill is just large enough to make the pilot hole for your screw-eye hook—if you make too big a hole, the hook won’t stay in place.
Using your hand drill, carefully drill a hole less than half the length of the hook's post into the jewelry where you want the hook to be. Take the drill out and use your fingers to twist the screw-eye hook into the hole all the way to the base of the hook for a snug hold.
Step 10: Complete your jewelry assembly
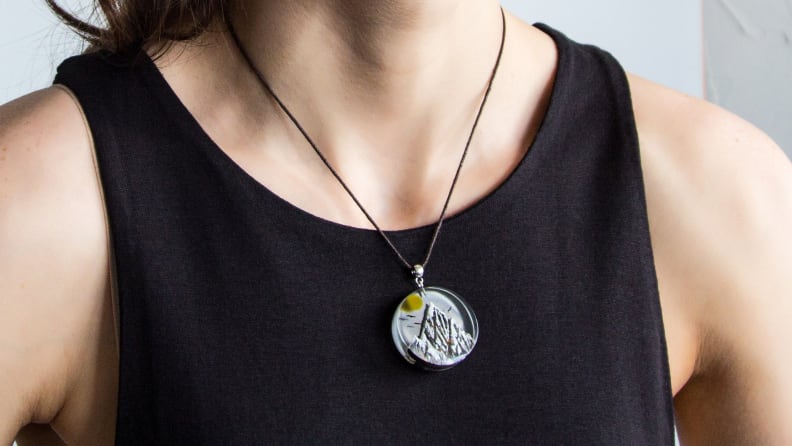
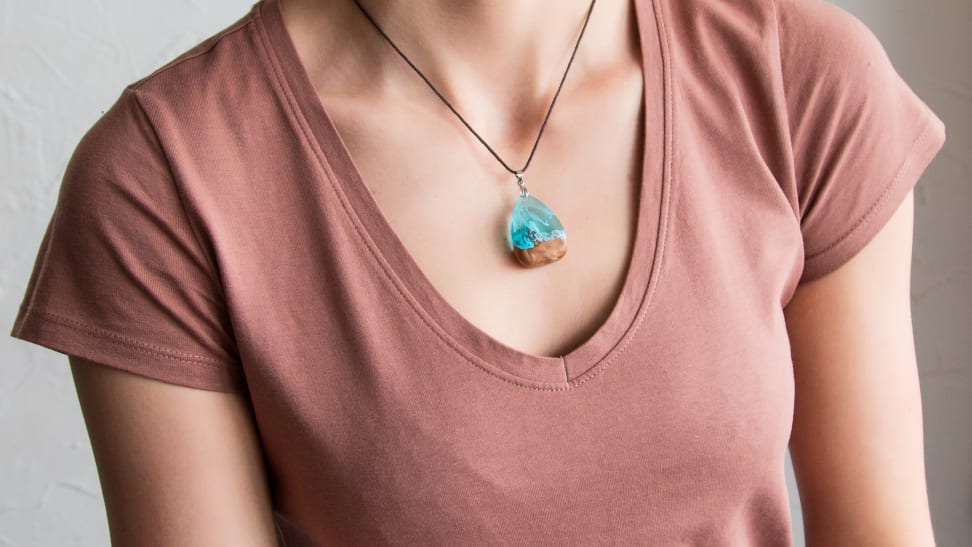
Wear your finished jewelry proudly!
Hopefully you’ve decided whether or not you want this jewelry to be a necklace or an earring or some other jewelry by now, but if not, decide quickly! Then grab your chain nose pliers and open up one of the open circles and slide that through the screw-eye hook in your jewelry. While the circle is open, slide either the earring hook or necklace chain link onto it. Then use your pliers to close the open circle so there isn’t a gap anymore. And there you have it: your very own piece of jewelry! Wear it yourself, give it to a friend, or sell it online. No matter what, be proud of yourself for making such a pretty piece of wearable art.
The product experts at Reviewed have all your shopping needs covered. Follow Reviewed on Facebook, Twitter, and Instagram for the latest deals, reviews, and more.
Prices were accurate at the time this article was published but may change over time.

